Natural Year Challenge: Food - Month Five
Make a Dairy Ferment
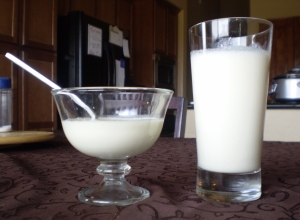
 Two of the simplest dairy ferments to make at home are yogurt and kefir. Many who are lactose-intolerant find they can handle fermented dairy. The fermenting process pre-digests the proteins and sugars in the milk, making the nutrients in dairy more available to the body. (If dairy is not tolerated, coconut milk works well.) The health benefits are numerous for either of these foods. Our bodies love the "good gut guys!"
Russian immunologist Eli Metchnikoff, Nobel prize winner in 1908 for his work in the area of cellular immunity, studied the dietary habits of a certain Bulgarian population who enjoyed long and healthy lives. Metchnikoff noted that these people ate large amounts of yogurt, concluding that there is a connection between health and consumption of lactic acid bacteria found in fermented milk.
If you cannot obtain certified raw milk, the next best option is organic milk. Organic Valley is now offering Grassmilk, whole non-homogenized milk from grassfed cows. Avoid ultra-pasteurized milk, as it is too processed to support a culture well. For a list of local sources of raw milk, visit the Real Milk website.
Yogurt
- Pour 1 pint milk into sauce pan. If the milk is raw, heat to 110 degrees. If it is pasteurized, heat to 180 degrees and allow to cool to 110.
- Add starter or 1/2 c. yogurt from previous batch. Store-bought yogurt may also be used—be sure it says "live cultures" on the label. Stir/blend well.
- Pour into quart size jar. Cover.
- Place in dehydrator and ferment for 24 hours at 100 degrees.* Some people make their own dehydrator by putting their oven on its lowest temperature and keeping the oven door open. The yogurt may also be fermented in a stainless steel thermos for 24 hours. A yogurt maker also works well.
* There are a few strains of yogurt that can be cultured at room temperature. Check out Cultures for Health to learn more about Viili and other countertop yogurt starters.
Kefir
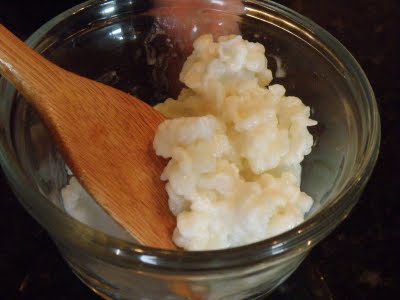
 The kefir fermenting process begins with "grains" (pictured at right), which resemble clumps of cauliflower but are actually clusters of healthy yeasts and bacteria. Kefir grains may be obtained through friends or fellow co-op members, or from online sources such as these:
- Yemoos Nourishing Cultures
- The Kefir Lady
- Cultures For Health (these are dehydrated—a little tricky, but a viable option)
Steps for making kefir:
- Place 1-2 tablespoons of kefir grains in clean glass jar. A quart or 1/2-gallon mason jar works well.
- Add 2 cups fresh milk. The milk may be room-temperature or chilled. You may want to allow an extra hour for fermentation if using cold milk.
- Gently stir contents, cover jar, and move to a location away from direct sunlight. This might be a cupboard, pantry, or darker side of the kitchen. You can cover with a cloth or use a lid. If a jar is sealed tightly, a slightly carbonated kefir will result. Generally the kefir is given some room to breathe.
- Allow the mixture to ferment for a minimum of 24 hours. It is not advisable to go beyond 48 hours.
- Pour contents of the jar into a strainer. Some websites suggest avoiding metal strainers and utensils, while others say it doesn't matter because of the short duration of their contact with the kefir.
- Take the strained grains, place them in a clean glass jar, and begin the process again. (You can "rest" the grains in the refrigerator covered in milk or yogurt, which should be changed every 7 days.)
- Optional: Leave the strained kefir at room temperature for another 24 hours to increase its nutritional value. The kefir will become more sour, so feel free to enjoy after the initial 24-hour period, as it is officially fermented and nutritious at that point.
Cultured Cream
In a glass jar, combine one pint organic, good quality cream with 2 tablespoons kefir or yogurt. Place cap on jar and leave on counter for 24 hours. Move to refrigerator.
Challenge Alert!
To prepare for next month's challenge, buy some cheesecloth or, even better, a whey straining bag. We will be making whey from either yogurt or kefir!
In the following video, Andrea provides a step-by-step demonstration of the recipes given above. We hope you'll give them a try and start enjoying the many health benefits of dairy ferments!

