How to Make Dairy Kefir
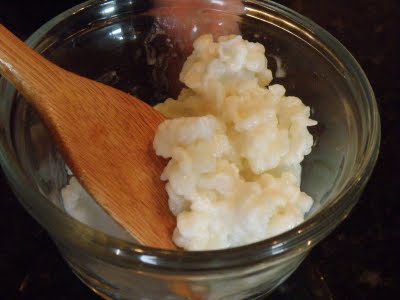
Dairy kefir is simple to make, provided you have healthy grains. Kefir grains (pictured below, and described in our Health Benefits of Kefir article) may be obtained through friends or fellow co-op members, or through the Internet. Here are several online options:
- The Kefir Lady
- Yemoos Nourishing Cultures
- Cultures for Health (these are dehydrated—a little tricky, but a viable option)

Steps for making kefir:
- Place 1-2 tablespoons of kefir grains in clean glass jar. A quart or 1/2-gallon mason jar works well.
- Add 2 cups fresh milk. Any type of milk will work, including cow, goat, and coconut. Raw milk is ideal, particularly goat milk. Pasteurized milk will work. Try to avoid ultra-pasteurized, as the UHT (ultra-high temperature) is so high that the grains may not thrive. For sources of raw milk, visit this website.
The milk may be room-temperature or chilled. You may want to allow an extra hour for fermentation if using cold milk. - Gently stir contents, cover jar with a cloth or a lid left slightly ajar, and move to a location away from direct sunlight. This might be a cupboard, pantry, or darker side of the kitchen.
- Allow the mixture to ferment for a minimum of 24 hours. It is not advisable to go beyond 48 hours.
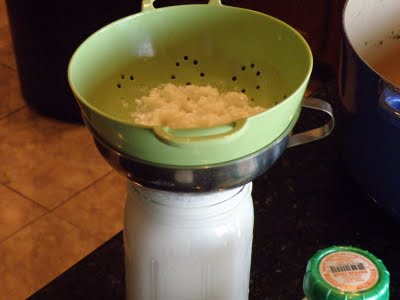
- Pour contents of the jar into a strainer. Some websites suggest avoiding metal strainers and utensils, while others say it doesn't matter because of the short duration of their contact with the kefir.

- Take the strained grains, place them in a clean glass jar, and begin the process again. (You can "rest" the grains in the refrigerator covered in milk or yogurt, which must be changed every 7 days.)
- Optional: Leave the strained kefir at room temperature for another 24 hours to increase its nutritional value. The kefir will become more sour, so feel free to enjoy after the initial 24-hour period, as it is officially fermented and nutritious at that point.

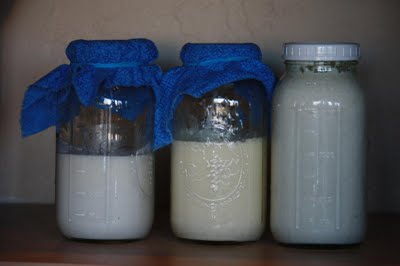
The above picture shows the fermenting of raw goat milk and pasteurized whipping cream, and also the "ripening" of freshly-made coconut kefir.
Drinking plain kefir is often an acquired taste, but recipes are limited only by your imagination. Cream kefir flavored with a little bit of vanilla, strawberry/banana smoothies, and even ice cream made with cream kefir, cacao nibs, and "cookie dough" (coconut flour, cacao nibs, stevia, and eggs) are possibilities worth exploring! (For some other great flavoring ideas, see the Yemoos Nourishing Cultures website.)
Water kefir uses different grains and is processed differently from dairy kefir (see the Yemoos Nourishing Cultures website for extensive information on the care and feeding of water kefir). Coconut water kefir is simple to make using the packaged starter culture offered by Body Ecology.
Kefir is a probiotic food and therefore has strong healing properties which can cause severe die-off reactions. It's best to start small (a teaspoon) and build from there.
Kefir can also be used topically for rashes and for general skin care. Mix cream kefir with essential oil and use it as a moisturizer (see our article on All-Natural Personal Care). Run a cupful of kefir through your dishwasher cycle. Kefir whey makes an excellent shaving lotion and clarifying hair conditioner (see our article on The Skin Care Benefits of Whey).
Making kefir is an enjoyable task for many of us. There's something about watching the "good guys" overtake the "bad guys" and realizing that a similar battle is waged internally when we drink it. Something we'll grow to appreciate even as the benefits of probiotic foods like kefir become better understood.

